It’s official, this whole need-to-create-things is hereditary. Not only the creativity gene bit but the comfort found in just making stuff.
I was at mum’s house for a few weeks during our last trip and one day she brought out a lovely, frilly, very colourful apron, “Look! I saw this and had to get it for you. Thought it may be a bit of inspiration… you could make these!”
It was a cute apron, and it did give me a few new ideas, but in the midst of packing our already busting suitcases it failed the ‘useful while hiking in the mountains of South America‘ portion of the exam and remained at mum’s house.
Then the other day I had a conversation with my mother that was slightly random but filled with pretty things – like most of our conversations, and to be honest like most of my posts.
FYI this paints an extraordinarily accurate picture of 1. how my mind functions, 2. how I ended up this way, and 3. how impressive it is if you can follow along with anything that happens at any gathering of my family, ever. The fact that RJ can keep up is one of the reasons I married him, bless.
M – Hey, remember that apron I got you? You left it here, do you want it or should I give it away?
J – It was cute, but there was no room in our bags, I figured I’d get it next time… but you can give it away if you know someone who would love it, I have a couple aprons” [lets note for a moment that of the roughly 5 aprons I own I only wear one of them, and only about once a year…]
M – Humm, maybe I’ll just keep it here for when you visit?
J – Ok, good idea, just hang it in the kitchen closet.
M – You know, it would look great hanging on a wall as a decoration… but it’s the wrong the pallet for my kitchen…. Oh, did I tell you I’m thinking of taking down the scarves above the kitchen windows and changing up the colours? I’m kind of sick of them but if I … insert lots of stuff here about how the kitchen still needs to flow with the lounge room and what can be changed and not make it look strange … it will be different and should work, what do you think?
J – Yeah, I like it, probably about time for a change … insert more stuff here about the kitchen and lounge room …
M – How am I even considering this? I have so much to do and I’m already run off my feet, yet somehow I think I can find time to redecorate the house, again.
J – Ha, want to know what I did last week? I had sites to build and photos to edit and emails to answer and instead I spent a full day – a.full.day – making food-based Easter egg dyes. It was fabulous.
And oh how we laughed.
At that point we moved onto different topics secure in the knowledge that inherited creative distraction is quite possibly the best kind. Especially when it turns out as pretty as these eggs.
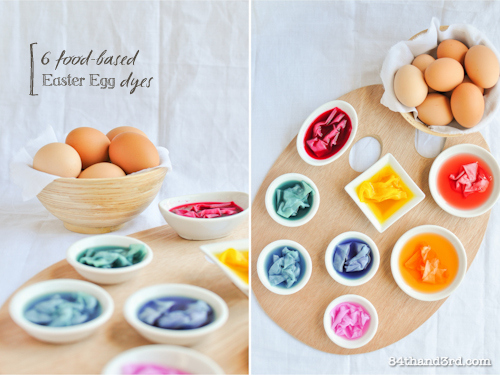
I’ve been wanting to try out natural food dyes for ages, if only because I’m kind of a geek. I tested out a square of white fabric with each just to see what would happen but also because we don’t have white eggs. I made it into bunting because of aforementioned creative distraction gene.
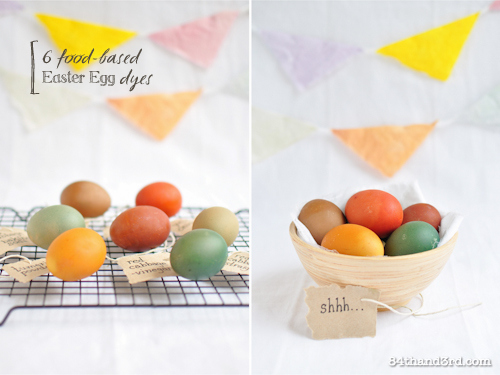
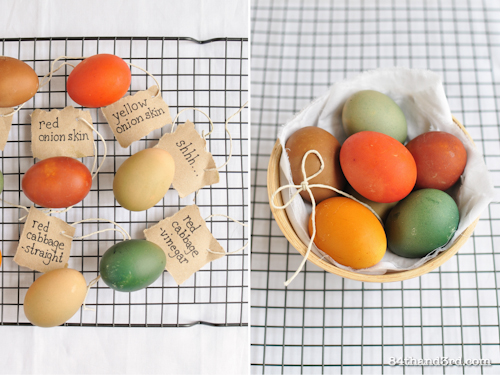
The brown eggs came out elegant and sophisticated – and funny enough would match mum’s living room perfectly – but I do wish I could get my hands on some white ones for this little experiment!
If you try this please share some pics – I’d love to see how they turn out.
Some of the dyes were as expected and some were really surprising. On a few of the dyes I felt they should have been stronger and the recipe represents that. It is definitely worth giving this a go!
Make sure to pop over here to see what I did with all those leftover hard boiled eggs!
6 Food-based Dyes for Easter Eggs
 This really is brilliant. And fun, and messy and unexpected in many cases. Remember 10th grade Chemistry? This is that, without the creepy teacher and incessant note passing and the deadly fumes. Feel free to flirt like a teenager with your group activity partner.
INGREDIENTS:
- 12 or 18 hard boiled eggs
- 6 tall glass jars*
- 1 Beetroot fresh, grated
- 3 Red Onions, papery skins only
- 3 Yellow/Brown Onions, papery skins only
- 1 Tbsp Tumeric Powder
- 1 small Red Cabbage, shredded
- 1 cup White Vinegar, divided
- 1 Tbsp Baking [bi-carb] Soda, give or take
METHOD FOR DYES:
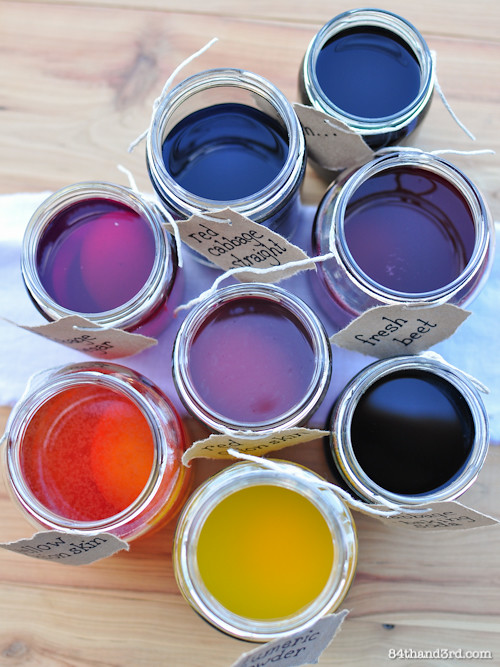
Place grated beets, red onion skins, brown onion skins and tumeric in separate stainless steel pans. Add 3 cups water to each and bring to a boil. Reduce heat and simmer 25 minutes for onions and beets and 15 mins for tumeric.
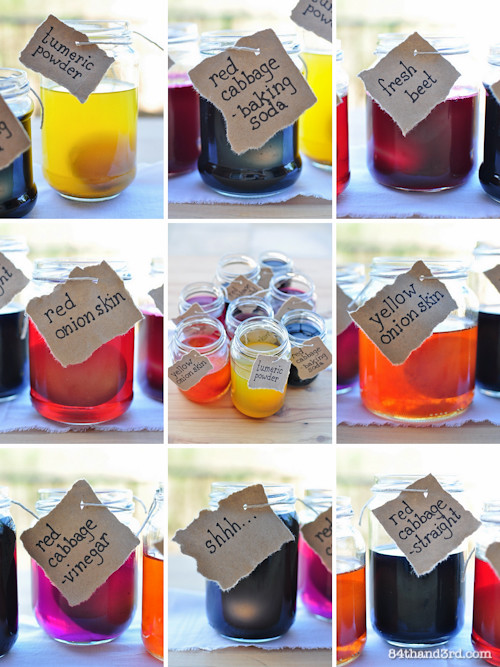
Strain dyes into separate jars, discard solids – the tumeric powder will simply sink to the bottom, it’s fine. Stir 2 1/2 Tbsp of vinegar into each jar of dye – this equates to about 1 Tbsp per cup of liquid.
Place half shredded red cabbage into one pan and half into another pan. Add 3 cups water to each and bring to a boil. Reduce heat and simmer 25 minutes.
Stir 2 1/2 Tbsp vinegar into one pan and 1 Tbsp Baking Soda into the other pan. What happens here is so cool, it has to do with ph values. See, I told you, chemistry. Strain into separate jars.
METHOD FOR EGGS:
Place eggs in a pan and fill with cold water. Bring to a boil, reduce heat and simmer 1 minute. Remove from heat, cover and allow to sit 10 minutes. Run cold water over eggs until cool to stop the cooking.
Use a dessert or soup spoon to place eggs in jars of dye. Store in fridge overnight, shaking gently when you remember to prevent blanks spots where the eggs are touching the jar. Remove using spoon. Discard dye and place eggs on a paper towel lined rack to drain and dry.
DYES:
Note, results are for brown-shelled eggs, white-shelled eggs will be more vibrant and different in some cases.
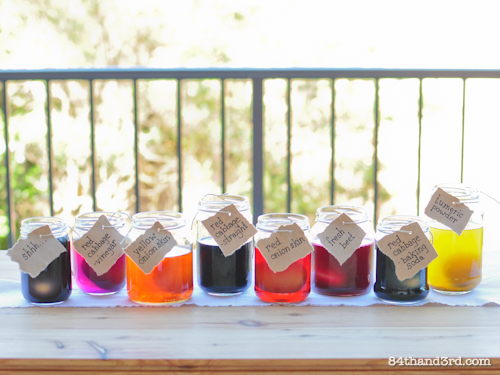
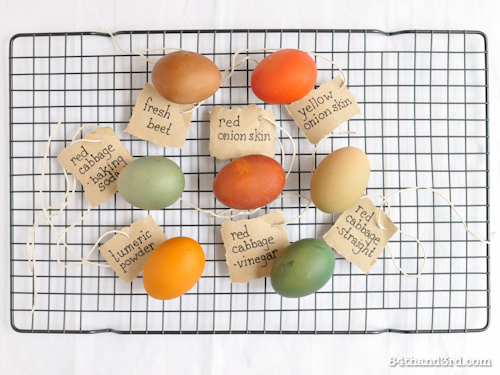
- Fresh Beetroot + Vinegar = Deep Pink dye
- brownish red egg, pink fabric
- Red Onion Skins + Vinegar = Deep Orange/Red dye
- deep rust egg, maroon/brown fabric
- Brown/Yellow Onion Skins + Vinegar = Deep Yellow/Orange dye
- bright orange egg, true orange fabric
- Tumeric Powder + Vinegar = Bright Yellow dye
- bright yellow/orange egg, bright yellow fabric
- Red Cabbage + Vinegar = Bright Purple dye
- deep green egg (yeah, really), light purple fabric
- Red Cabbage + Baking [Bicarb] Soda = Deep Green dye
- Light green/blue egg, light green fabric
- Red Cabbage, straight = Deep Blue dye, looks great, pretty much useless for dying but you can try.
- muddy meh egg, light meh fabric
COOK’S NOTES & WARNINGS:
- Why jars?: you want the dye to cover the eggs, the narrower the container the higher the liquid – science all over the place here – and the easier it is to cover the eggs. Plastic containers will work too.
- This stuff will stain: it is dye after all. Especially the tumeric. Wear old clothes and cover porous counter-tops. Use stainless steel for boiling and glass for soaking.
- If you do get stains all is not lost: I managed to get rid of the cabbage water stain on the counter by leaving some lemon juice on it for a few hours. Oxygen-powder-laundry soap and a good soak got some other spots out of the white fabric I used in the bowl in the pics.
- The dye will wipe off the eggs until they are very dry: I have seen recommendations to rub them with vegetable oil to make them shiny but I wanted mine matte and didn’t hide them around the house so didn’t really need to add a protective layer.
- Boiling the eggs: starting with room-temp eggs instead of cold ones will help them not crack. Do not add baking soda or vinegar as this will impact the red cabbage based dyes.
- What was shhhh…?: A mix of beet dye and straight red cabbage made for a lovely purple liquid but was a fail on both eggs and fabric. Think this was more the result of the straight red cabbage not being particularly potent than the mixing.
While all recipes are my own some sanity checks were done here, here and here.



So gorgeously done JJ. I have been wanting to do a post about natural food dyes for the past 3 years and just have never gotten around to it.
Now I will just need to share and revert to this gorgeous post.
The colours from natural dyes are just so beautiful compared to the packet ones you can buy.
Thanks! You know I’m here for you Sara ;D
Ooh this is such a great idea! Love the yellow onion skin one!
I was so impressed with the both the onion skin ones but the green from the red cabbage had to be a fave!
This is so awesome JJ! I’ve never seen a post like this very cool 🙂
I seem to recall seeing white eggs in our local Greek deli at the time of their Easter (May this year) as they have the tradition of dyeing eggs red. You may be able to check with any Greek delis in your area.
Love your eggs.
Fabulous tip, thanks Carmen!
Wow! This has me intrigued JJ! What an effort! I’m loving all these different ideas and colours!
Love your dedication to this JJ! It’s only a shame that here in Australia white eggs are so hard to come by as the colours would be so much more vibrant! Great post – pinned!
Cheers Marty
I definitely need to start experimenting with natural food dyes. They look wonderful and I love the range of colours you’ve been able to acheive.
What a great turn out! Love the colours! And oh so creative! Love the convo with your mom. Thanks for sharing.
heehee welcome to the madness ;D I can imagine you have quite a few funny ones with all the girls in your house!
how pretty!
I love both the color scheme and the natural ingredients. Thanks so much for sharing this!
No problem and thank you for including it in your weekly roundup!
I love, love, love this post JJ. It reminds me of being a little girl in my grandmas kitchen. I am printing this one out to do with the kids.
BTW – I want to see the pretty bunting picture too 🙂
Cheers, hope you had time to try it out! The bunting is in the background in the first few pics 😉
Whats the shhhhh made from?
Hi Cookie, it was in the very end of the recipe 🙂 ‘A mix of beet dye and straight red cabbage’
My friend and I are gonna try it on white eggs then do tie dye shirts white and light brown cause your eggs came out so pretty with the brown ones <3 🙂 I love the colors!
Oh derp! Should read the whole thing first…………….
Wow! Beautiful eggs, thanks for sharing. Love the detailed instructions too 🙂