Don’t make this bread. I only say this because I am looking out for you, it is so good I can’t stop. I have made it every weekend for the past three weeks – all in the name of testing of course …
Here’s the thing, it is a total double edged sword, you are only actively ‘making the bread’ for about 15-20 minutes … but it takes a day and a half or so of patience waiting around for it to do it’s thing. This is not a ‘quick bread’ but it is quite possibly the least labour intensive one I’ve ever made … ‘lazy bread’ perhaps?
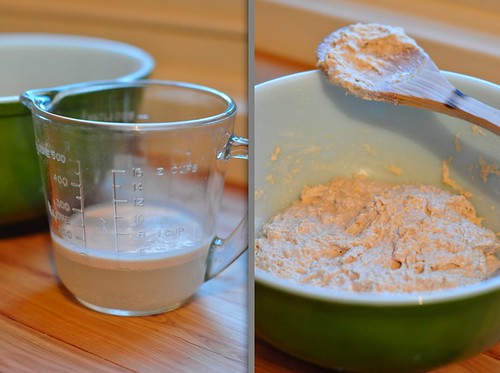
There is no kneading; no ‘add enough of the remaining flour to achieve x consistency’; no guesstimates due to humidity; and only a handful of ingredients. But the waiting is where it gets you. First up you need about 10 mins or so to proof the yeast and stir it together with some flour and water …
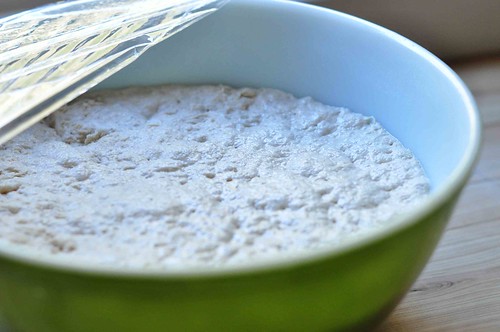
… annnnnnddd then let it sit for 12 hours or more [I have left it as long as 16 in one instance, it is however the middle of winter, but even in summer it will most likely be fine, sourdough gets left for days]. Do this at night and it will work as you sleep just like a good kitchen hand should.
Then, you spend about 2 minutes turning it out … for it to sit for another 15. Then another 2 minutes to form it … and it gets to rest and rise for 2 hours.
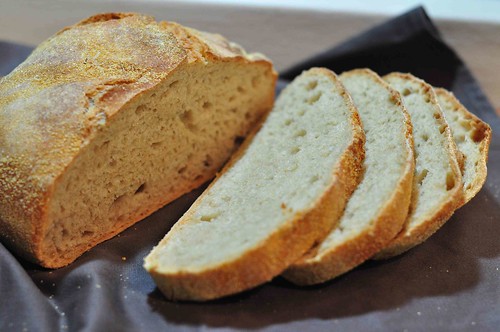
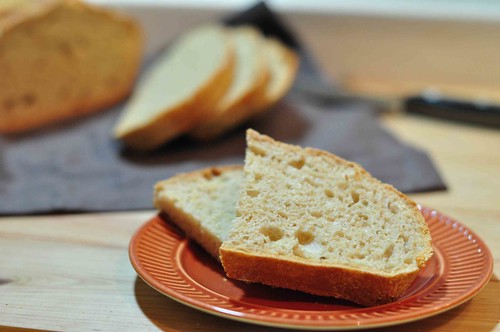
Then you bake it. And try desperately to wait for it to cool before cutting it into inappropriately thick slices and trying out every spread in both the fridge and the pantry [not that I’m speaking from experience or anything …].
The original recipe was all white flour. I have substituted in 1 cup of Whole Wheat and reduced the water a bit to accommodate. I did try it once with 2 cups Whole Wheat and one White, and while still nice, it didn’t have the lightness to it. Next up is a half and half split, I’ll let you know how it goes.
You only use a little bit of dry yeast, if you are anything like me you buy a box of perfectly proportioned packets and it will drive you nuts to only use part of one. It will be ok – just cut off the corner, measure out what you need, stick some tape over the opening and pop it back in the fridge [you DO store your yeast in the fridge, right?] anyway, when you make this again, voila, use a bit more of the open pack. I added just a small bit of sugar, because I can never get yeast to proof with out it.
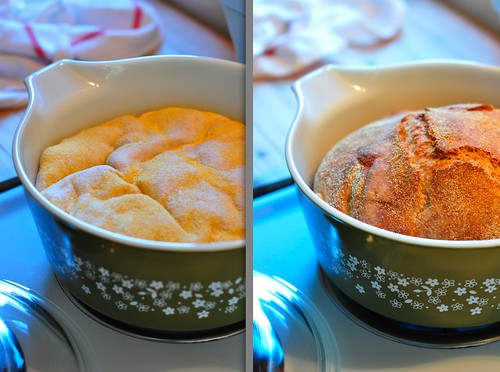
Now remember, size does matter, well for the dish you use to bake it in at least. First time I had my 28 cm/11 inch Le Chasseur pot at the ready and it was way too big across the base – the loaf was pretty flat when it was all done. Second time out came the vintage Pyrex casserole pot, think it is a 2 1/2 quart one, approx 8 inch base [pattern check: Crazy Daisy, also sometimes found as Spring Blossom] – perfect. Just experiment, but make sure that you have a cover for what ever you use. Honestly a large oven safe saucepan or a heavy gauge baking dish would probably work just as well.
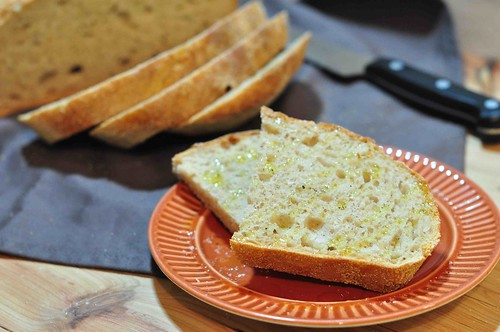
I think this would be really good with some cinnamon and sultanas, or italian herbs and black olives, or with sundried tomatoes and basil but it is just perfect plain with a drizzle of extra virgin olive oil and a sprinkling of sea salt too.
Try it if you want to risk obsession. Tell me how it goes!
~~~
No-Knead Bread
Adapted from Big Girls Small Kitchen
Ingredients
1 cup whole wheat flour
2 cups unbleached white flour
1 1/2 cups warm/room temp water
1/4 tsp sugar
3/4 tsp active dry yeast
1 1/4 tsp kosher salt
1/4 tsp sea salt
2 Tbsp unbleached white flour extra
Cornmeal [polenta]
Full Method:
Combine 1/2 cup water with the sugar and yeast, stir to dissolve and set aside for 10 minutes until foamy [this means that the yeast is alive].
In a large bowl combine the flours and salts and stir together well. Pour in the water/yeast mixture and the remaining cup of water. Stir vigorously for 2o strokes with a wooden spoon or rubber spatula to form a soft dough. Cover with plastic wrap and set aside for at least 12 hours until dough has grown considerably in size and has lots of small bubbles across the top.
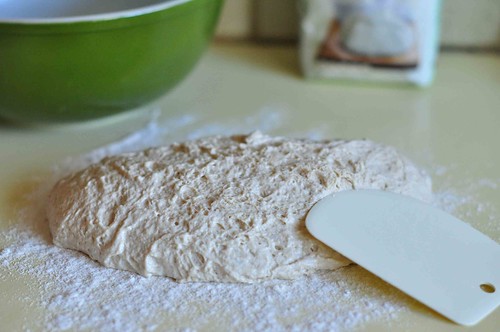
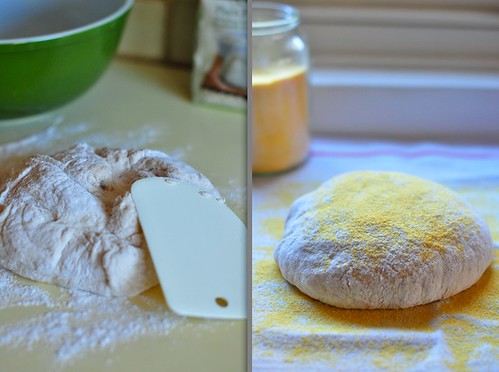
Sprinkle the bench-top with the extra white flour. Scrape dough out of the bowl directly onto the flour – if you have a dough scraper [about $1.50 from a kitchen store, or just use an old credit card, yep, I’m serious, maybe wash it first…] use it now, if not, use a firm spatula. Let the dough rest for 15 mins and meanwhile dust half of a tea-towel [non terry-cloth] with the cornmeal.
Using the scraper, shape the dough into a ball by lifting the edges from underneath and pressing onto to the top. Place the dough seam side down on the cornmeal-ed side of towel, dust with more cornmeal and lightly fold over the towel. Leave to rise for 2 hours.
During the last 30 mins of rising, place a heavy pot, with a cover on it, into the oven and pre-heat to 230 degrees C [450 F]. Remove the pot from the oven after 30 minutes and place on a stove burner or a sturdy cooling rack. Pick up the tea towel with the dough in it and carefully turn it into the hot pot with the seam-side that was on the bottom, now on top. I sort of let it slide/flip off the towel keeping my hands as far from the hot pan as possible, don’t worry if all the extra cornmeal gets into the pot … or perhaps all over the counter top …
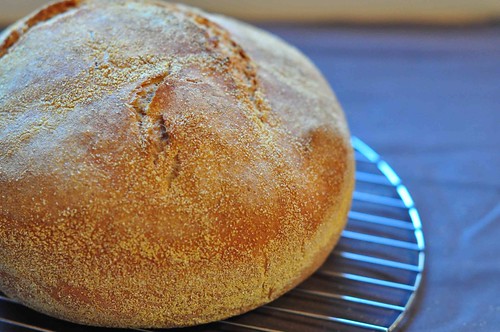
Shake pot gently to spread the dough, cover and return to the oven for 25 minutes. Remove cover and bake a further 20 minutes until golden brown and hollow when tapped on the base. Remove pot from oven and turn bread out onto a rack to cool before cutting.
Store in an airtight bag in the fridge for up to a week. If you are eating it after the first day, just toast the slices a bit to refresh them. Start another loaf as soon as the first one is gone.






I just made this and it turned out beautifully! I’m going to try adding nuts/seeds and some spices next time. or maybe a garlic/rosemary combination!
So glad you enjoyed it – garlic and rosemary sounds delicious, great idea!